Download UCS Emulator 3.12b (Or Later) Zip file
At the bottom of the post are links to download documents and files. You want to download the one that reads: UCSPE_3.1.2b.zip.
Extract that to a folder of your choosing. I put mine in D:\VirtualMachines\UCSPE
VirtualBox Network Settings
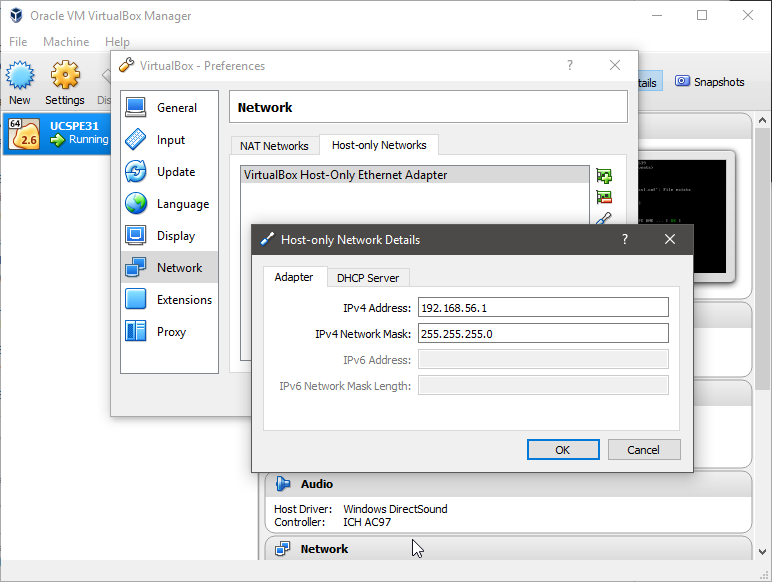
You can do this a couple of different ways, but I’m going to use a Host-Only Network in this example.
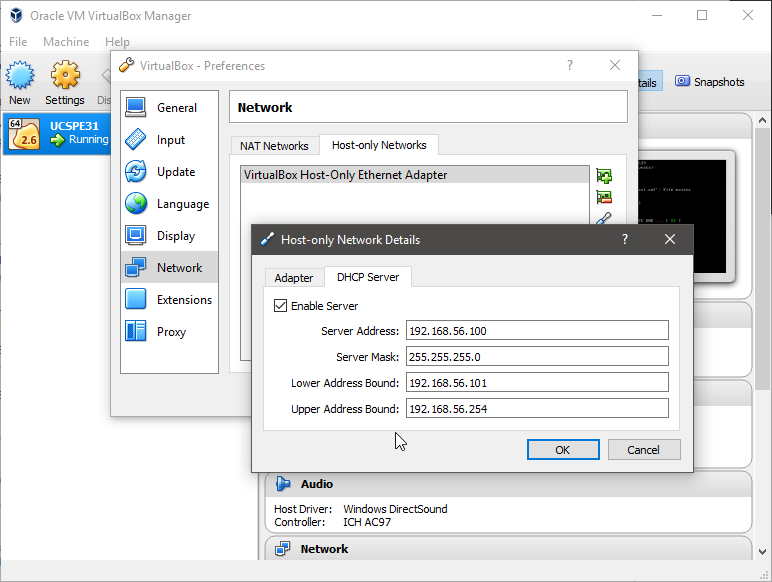
Mine is set up like this:
Host-Only Adapter
Host-Only DHCP
Creating the VirtualBox VM
On the Oracle VM VirtualBox Manager main screen, click the New button.
You’re going to get a window that looks like this:
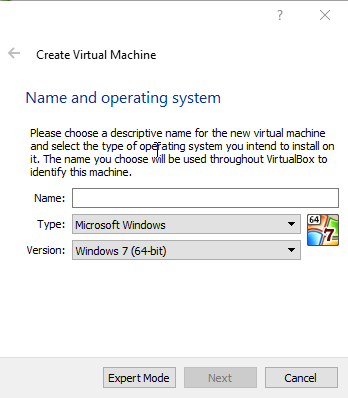
- Fill in Name: UCSPE31
- Select Type: Linux
- Select Version: Linux 2.6 / 3.x / 4.x (64-bit)
Click Next.
On the next page you’ll get asked how much RAM you want to allocate. In the VMX file, it shows the default memory is set to 1024, so that’s where I left it.
Click Next.
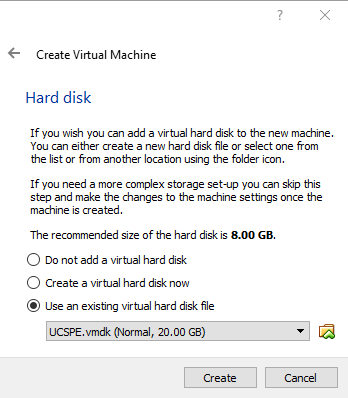
- Select the radio button for “Use an existing virtual hard disk file”.
- Click the folder with the green up arrow to browse for your VMDK file
- This will be located wherever you extracted the zip folder. Mine was in D:\VirtualMachines\UCSPE
- There will be many .VMDK files in the folder. You only want the one labeled UCSPE.vmdk.
Once you’ve selected your VMDK file, the window should look like this:
Note: The reason that you only choose the UCSPE.vmdk file is because it actually contains an extent list for all of the other VMDK files in the folder:
Click Create
UCSPE VM Network Settings
Remember we made the Host-Only Network before? Now we need to set up the VM to use it.
- Right click on the VM and select Settings
- Select Network from the menu on the left
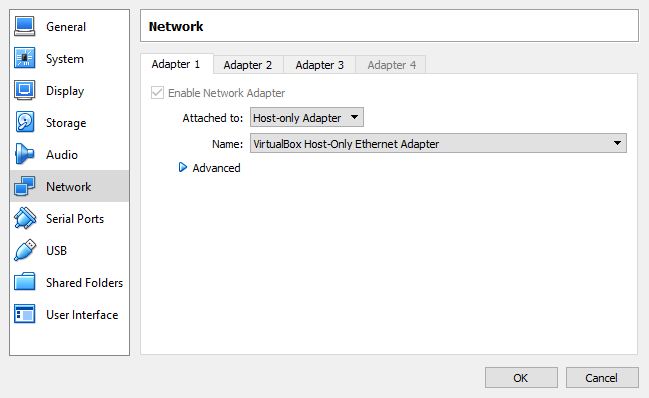
- On the right, for adapters 1-3
- Check: Enable Network Adapter
- Attached to: Host-only Adapter
- Name: VirtualBox Host-Only Ethernet Adapter
- Click OK
Note: The VM needs to be powered off to be able to complete the tasks above.
Here’s an example of what it should look like:
Now you’re ready to start up your UCSPE VM!